Uncategorized
How to Grow Magic Mushrooms
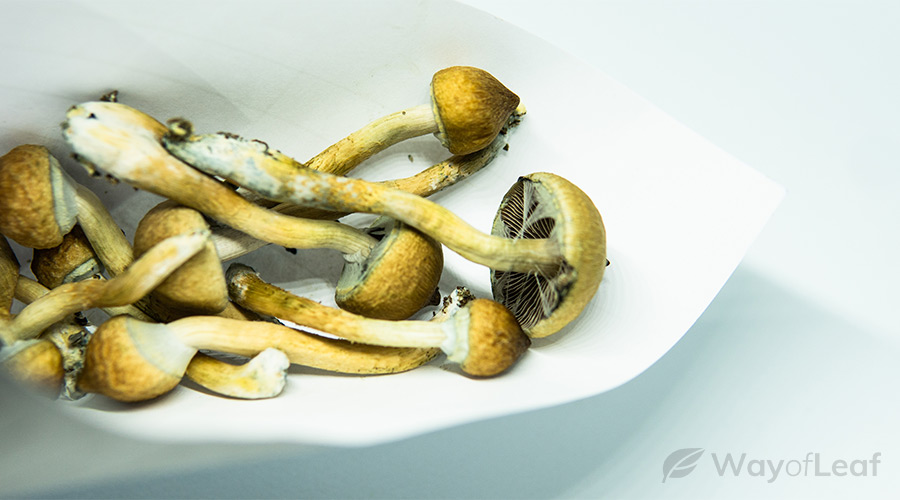
Psychedelic mushrooms, also known as magic mushrooms or shrooms, are surprisingly easy to grow. All you need is some basic equipment, a substrate, some spores, and a little patience.
In this beginner’s guide, we’ll explain everything you need to know about how to grow magic mushrooms at home. Before you know it, you’ll have a bountiful harvest on your hands.
How to Grow Psilocybin Mushrooms
Magic mushrooms are fungi containing the psychoactive compound psilocybin. This chemical acts on serotonin receptors in the brain to produce effects (commonly known as a trip).
Humans have used psilocybin mushrooms for thousands of years, and experts regard them as having a good safety profile. However, the Controlled Substances Act classifies them as a Schedule 1 Substance, and they are illegal in most places.
The situation is slowly changing as researchers learn more about the therapeutic potential of these mushrooms. But although they have now been decriminalized in several US cities, mushrooms are still challenging to come by. Therefore, more and more people are wondering about how to grow mushrooms at home.
Growing Magic Mushrooms
Magic mushrooms grow naturally in many different regions of the world. Therefore, if you live in the right place, you may be lucky enough to find some in the wild. However, for those without experience, it is easy to misidentify mushrooms – a potentially lethal mistake.

The best way to stay safe is to grow magic mushrooms at home or buy from a reputable source. Due to their current legal status, the latter may not be an option. It is, however, possible to purchase spores as these do not contain the active compound psilocybin.
That said, please note that growing shrooms is also illegal and readers choose to do so at their own discretion. This guide is for informational purposes only.
Where Do Magic Mushrooms Grow?
If you’re wondering, “where do shrooms grow?” the answer might be “closer than you think.”
Certain species, such as Psilocybe semilanceata, are widespread across North America and Europe. They also grow in many other regions of the world. Another species, Psilocybe cubensis, is prolific in tropical climates. P. cubensis is also one of the easiest types of mushrooms to grow at home.
If you plan on searching for mushrooms in the wild, your best bet may be to try densely forested areas close to water. Mushrooms require nutrients and moisture to grow, and these habitats provide both. Some species also grow in fields and grassland.
Before harvesting mushrooms, ensure you can positively identify them. Several species look similar to magic mushrooms but are actually poisonous. They can cause adverse reactions ranging from mild sickness to death. If you are unsure about whether a mushroom is safe, leave it alone.
How to Grow Magic Mushrooms at Home
Growing magic mushrooms at home is relatively simple. However, it does require good attention to hygiene and some patience. You will also need a few pieces of equipment, although most of them are easy to find.
The most challenging aspect is getting hold of a spore syringe. It is essential to purchase this piece of kit from a reputable supplier. Otherwise, you could end up with contaminated spores, misidentified strains, or in some cases, just water.
What Do You Need to Grow Mushrooms?
One of the easiest ways to cultivate mushrooms is by using a mushroom grow kit. They usually include a spore syringe, substrate, and grow bag – theoretically, everything you need. Some kits even have the mycelium (the main body of the fungus) ready to go. All you do is add water.

The problem with growing mushrooms from a kit is that you never know what you’re going to get.
Starting from scratch is more effort but produces more consistent results. It also reduces the risk of contamination and is a fantastic learning experience.
Homemade Magic Mushroom Grow Kits with Spores
Rather than purchasing a complete grow kit, you can make your own magic mushroom growing kit with spores from a syringe and some other essential items.
Here’s what you’ll need:
- 12 cc spore syringe
For the substrate:
- ⅔ cup vermiculite per jar + extra
- ¼ cup drinking water per jar
- ¼ cup organic brown rice flour per jar
Equipment:
- 12 shoulderless ½ pint jars
- Hammer and small nail
- Mixing bowl
- Strainer
- Heavy-duty tin foil
- Large pot with a tight-fitting lid
- Small towel
- Micropore tape
- 50–115L clear plastic storage box
- Drill with ¼-inch bit
- Perlite
- Spray bottle
Hygiene essentials:
- Rubbing alcohol
- Torch lighter
- Disinfectant
- Air sanitizer
- Latex gloves, surgical mask, still-air box (optional)
Process:
- Prepare the jars:
- Disinfect the hammer and nail and use them to punch four evenly-spaced holes around the lid’s circumference.
- Prepare the substrate:
- Mix ⅔ cup vermiculite and ¼ cup water per jar in a mixing bowl.
- Disinfect the strainer and remove the excess water.
- Add ¼ cup brown rice flour per jar and combine.
- Fill the jars:
- Loosely pack the substrate into the jars to around half-inch below the rims.
- Sterilize the exposed glass with rubbing alcohol, then top off with dry vermiculite.
- Steam to sterilize:
- Screw the jar lids on tightly and cover securely with foil.
- Ensure that no water or condensation can enter the jar through the holes.
- Place the towel in the base of the pan and arrange the jars on top.
- Add water to around halfway up the jars and bring to a slow boil.
- Steam for 75–90 minutes, adding more hot water if the pan boils dry.
- Keep the jars upright throughout.
- Allow to cool to room temperature for several hours or overnight.
- Prepare the spore syringe:
- Use the lighter to heat the syringe’s needle until red hot.
- Allow to cool and wipe with rubbing alcohol, taking care not to touch it.
- Pull back the plunger slightly and shake well.
- Reduce the risk of contamination by wearing latex gloves and a surgical mask, especially if the syringe requires assembly.
- Inject spores:
- Remove the foil from a jar and insert the syringe as far as possible through one of the holes.
- With the needle against the jar’s side, inject around ¼ cc of the spore solution.
- Repeat for each of the holes, cleaning the needle with alcohol between each one.
- Cover the holes with micropore tape.
- Repeat for remaining jars.
- Play the waiting game:
- Place the jars in a clean area where they won’t be disturbed.
- Keep at room temperature (70–80-degrees Fahrenheit) and out of direct sunlight.
- After 7–14 days, white mycelium should start to appear.
- After 3–4 weeks, at least half of the jars should have successful colonies or ‘cakes.’ At this stage, wait an additional seven days to strengthen the mycelium.
- If any jars show signs of contamination, dispose of them carefully. Do this outdoors using secure bags, without removing the lids.
- Prepare the fruiting chamber:
- Drill ¼-inch holes approximately two inches apart all over the plastic storage container, including its base and lid.
- Place the box on four stable objects to allow airflow underneath.
- Cover with a towel to retain moisture.
- Add perlite:
- Put the perlite in a strainer and soak it with water by running under the cold tap.
- Allow to drain thoroughly, then spread over the base of the chamber.
- Repeat the process until you have a 4–5-inch layer of perlite covering the base.
- Rehydrate the cakes:
- Remove the substrate cakes from the jars, taking care not to damage them.
- Rinse the cakes under the cold tap to remove loose vermiculite.
- Fill your cooking pot with lukewarm water and put the cakes inside.
- Use another pot or a plate to keep them under the water’s surface.
- Leave at room temperature for 24 hours while the cakes rehydrate.
- Roll the cakes:
- Remove the cakes from the water and put them on a disinfected surface.
- Fill the mixing bowl with dry vermiculite and roll the cakes to coat.
- Transfer:
- Place the cakes in the fruiting chamber, set upon foil squares big enough to stop them touching the perlite.
- Space them evenly and mist with the spray bottle.
- Fan with the lid before closing.
- Wait for fruiting to begin:
- Mist the chamber four times a day, but do not soak the cakes in water.
- Fan with the lid six times a day to improve air circulation.
- Some growers use lights set on a 12-hour cycle, but ambient lighting during the day is sufficient.
- Wait for mushrooms to appear.
How Long Does It Take to Grow Magic Mushrooms?
How long do shrooms take to grow? This can vary according to the variety and conditions.
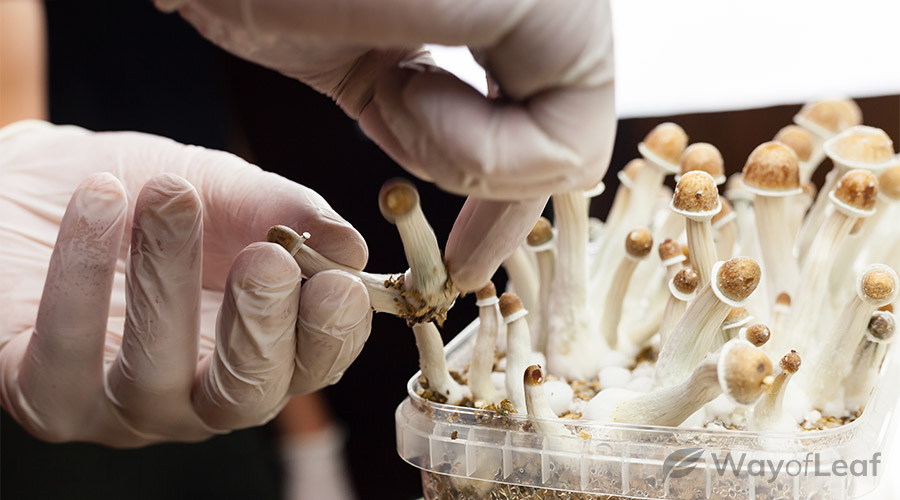
Keep a close eye on your mycelium cakes, and you should soon start to see them appearing as white bumps, which then sprout into ‘pins.’ The mushrooms should be ready to harvest 5–12 days after this. It is best to pick them before the veil breaks, revealing the gills.
Hopefully this guide on “how long does it take to grow mushrooms indoors” (~1–2 months) has been helpful. Remember, however – it is the responsibility of the reader to know and understand all rules and regulations regarding the cultivation of mushrooms in their specific state or region.
Our website has been reviewed and approved by uklistings.org – Durham Website Listings
Our website is listed in seolist.org – Alberta Digital Marketing Directory

 Français
 Deutsch
 中文 (中国)
 Español
I like reading through an article that can make people think.
Also, thanks for allowing me to comment!